Sewing Ostomy Bag Covers: Cute + Comfy!
Ostomy pouches are ugly! My colostomy was unplanned and came very suddenly, so body positivity was a struggle at the beginning. It was mortifying if it ever showed underneath my shirt. On top of that, they also aren't very comfortable, even with a fabric backing. The bottom opening can be sharp and dig into my thigh.
With any big change, it's important to find a way to make it cute and cozy.
Poking around the ostomate side of the internet, I saw someone on Reddit who drew storybook illustrations on the bags with colorful Sharpies. I'm more of a seamstress than an illustrator, so the bag covers on Etsy and elsewhere sparked my interest. Let's try making our own!
Materials
- • An ostomy pouch
- • Pattern-making supples: paper, pencils, French curves, rulers, scissors, a compass or something circular to trace, etc
- • Fabric: Something natural, breathable, and wicking like cotton is comfy. I don't recommend using your special or expensive fabric because accidents and stains happen.
- • Bias tape: I used elastic tape for my prototype, but since the circular opening is one big bias cut, finishing the edge with even more elastic threw off the fit.
- • Sewing supplies: Your typical thread, sharp needles, etc
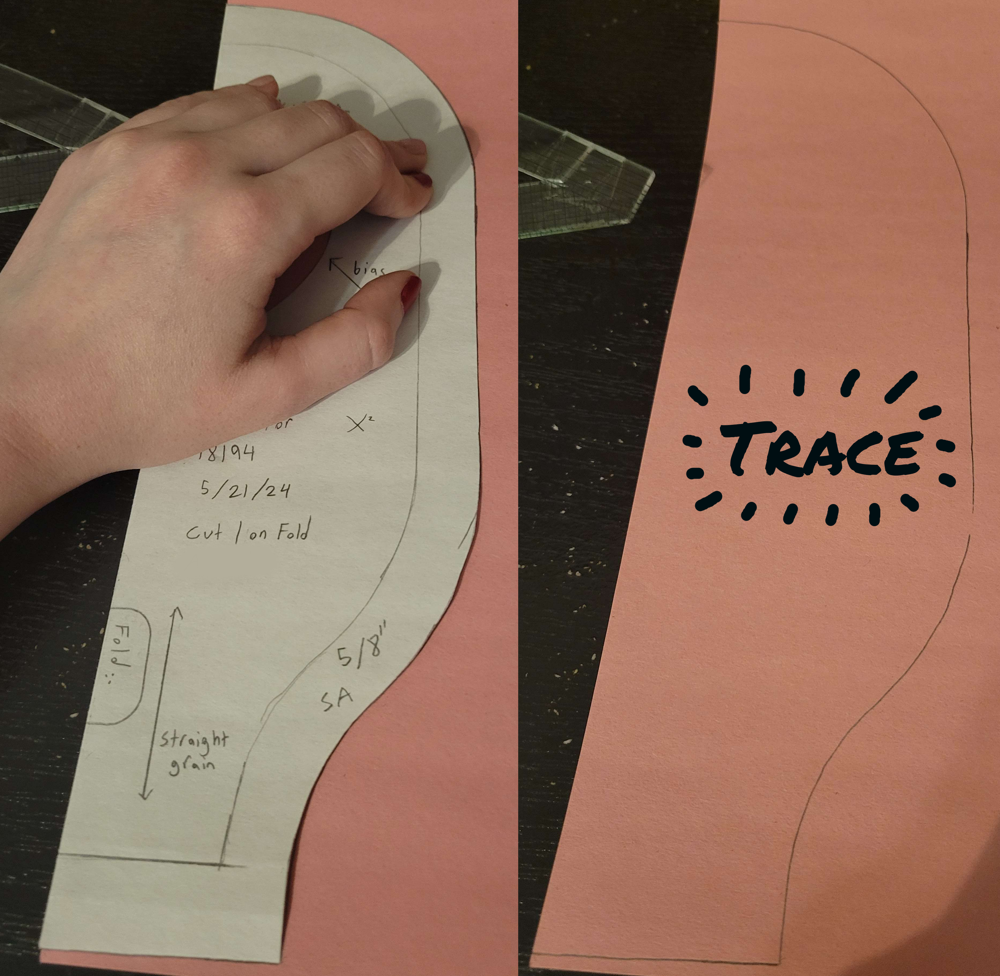
Trace your pouch
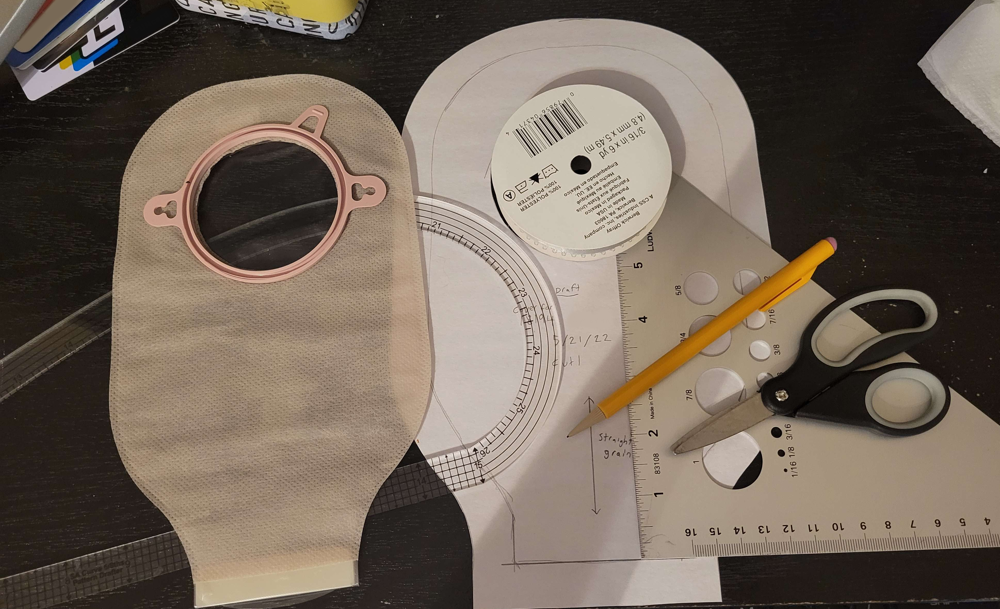
Grab a spare piece of paper and trace around your ostomy pouch. Do your best to trace around the circular opening, too. This ribbon spool happened to be about the same size, so I used it. Circular cuts inherently have a lot of stretch and flexibility to them, so err on the side of too small rather than too large.
I also added seam allowance around my tracing (but not the circular opening? Oops). I generally don't recommend adding the seam allowance this early, as it will reduce the accuracy of your pattern pieces. However, since it's such a simple accessory, it's not a big deal to me.
Choose your better half
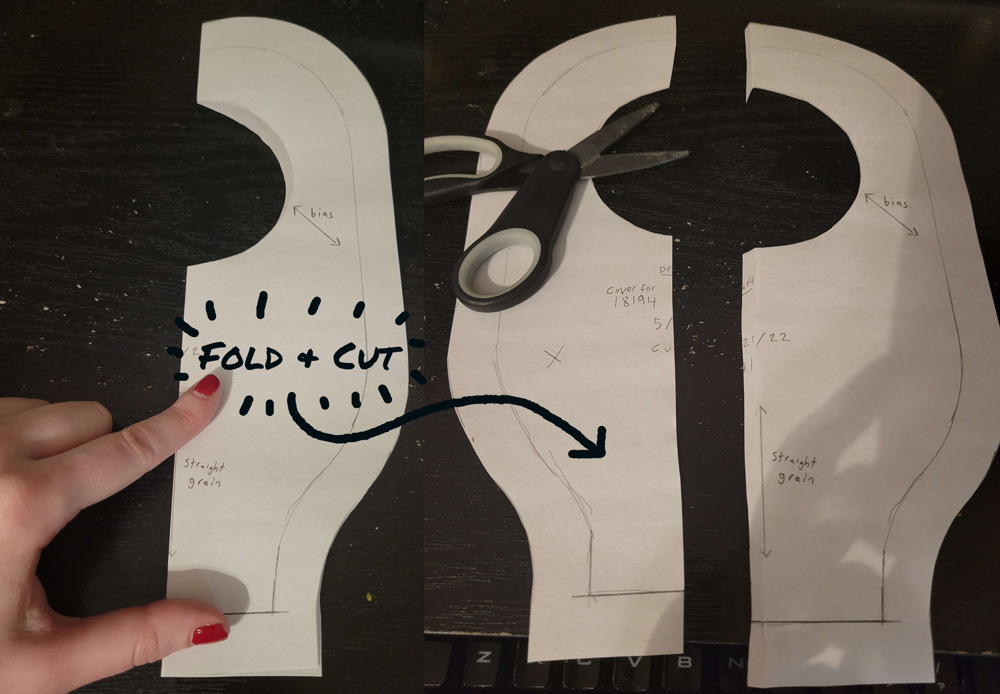
Fold the tracing. Your symmetry will be wonky, but do your best to find an average between sides. Clean up any rough edges by referencing some French curves and straight-edges. Again, since it's a simple accessory, the pieces don't have to be perfect. Draw an X on any rejected pattern pieces to avoid confusion.
Mark your pieces
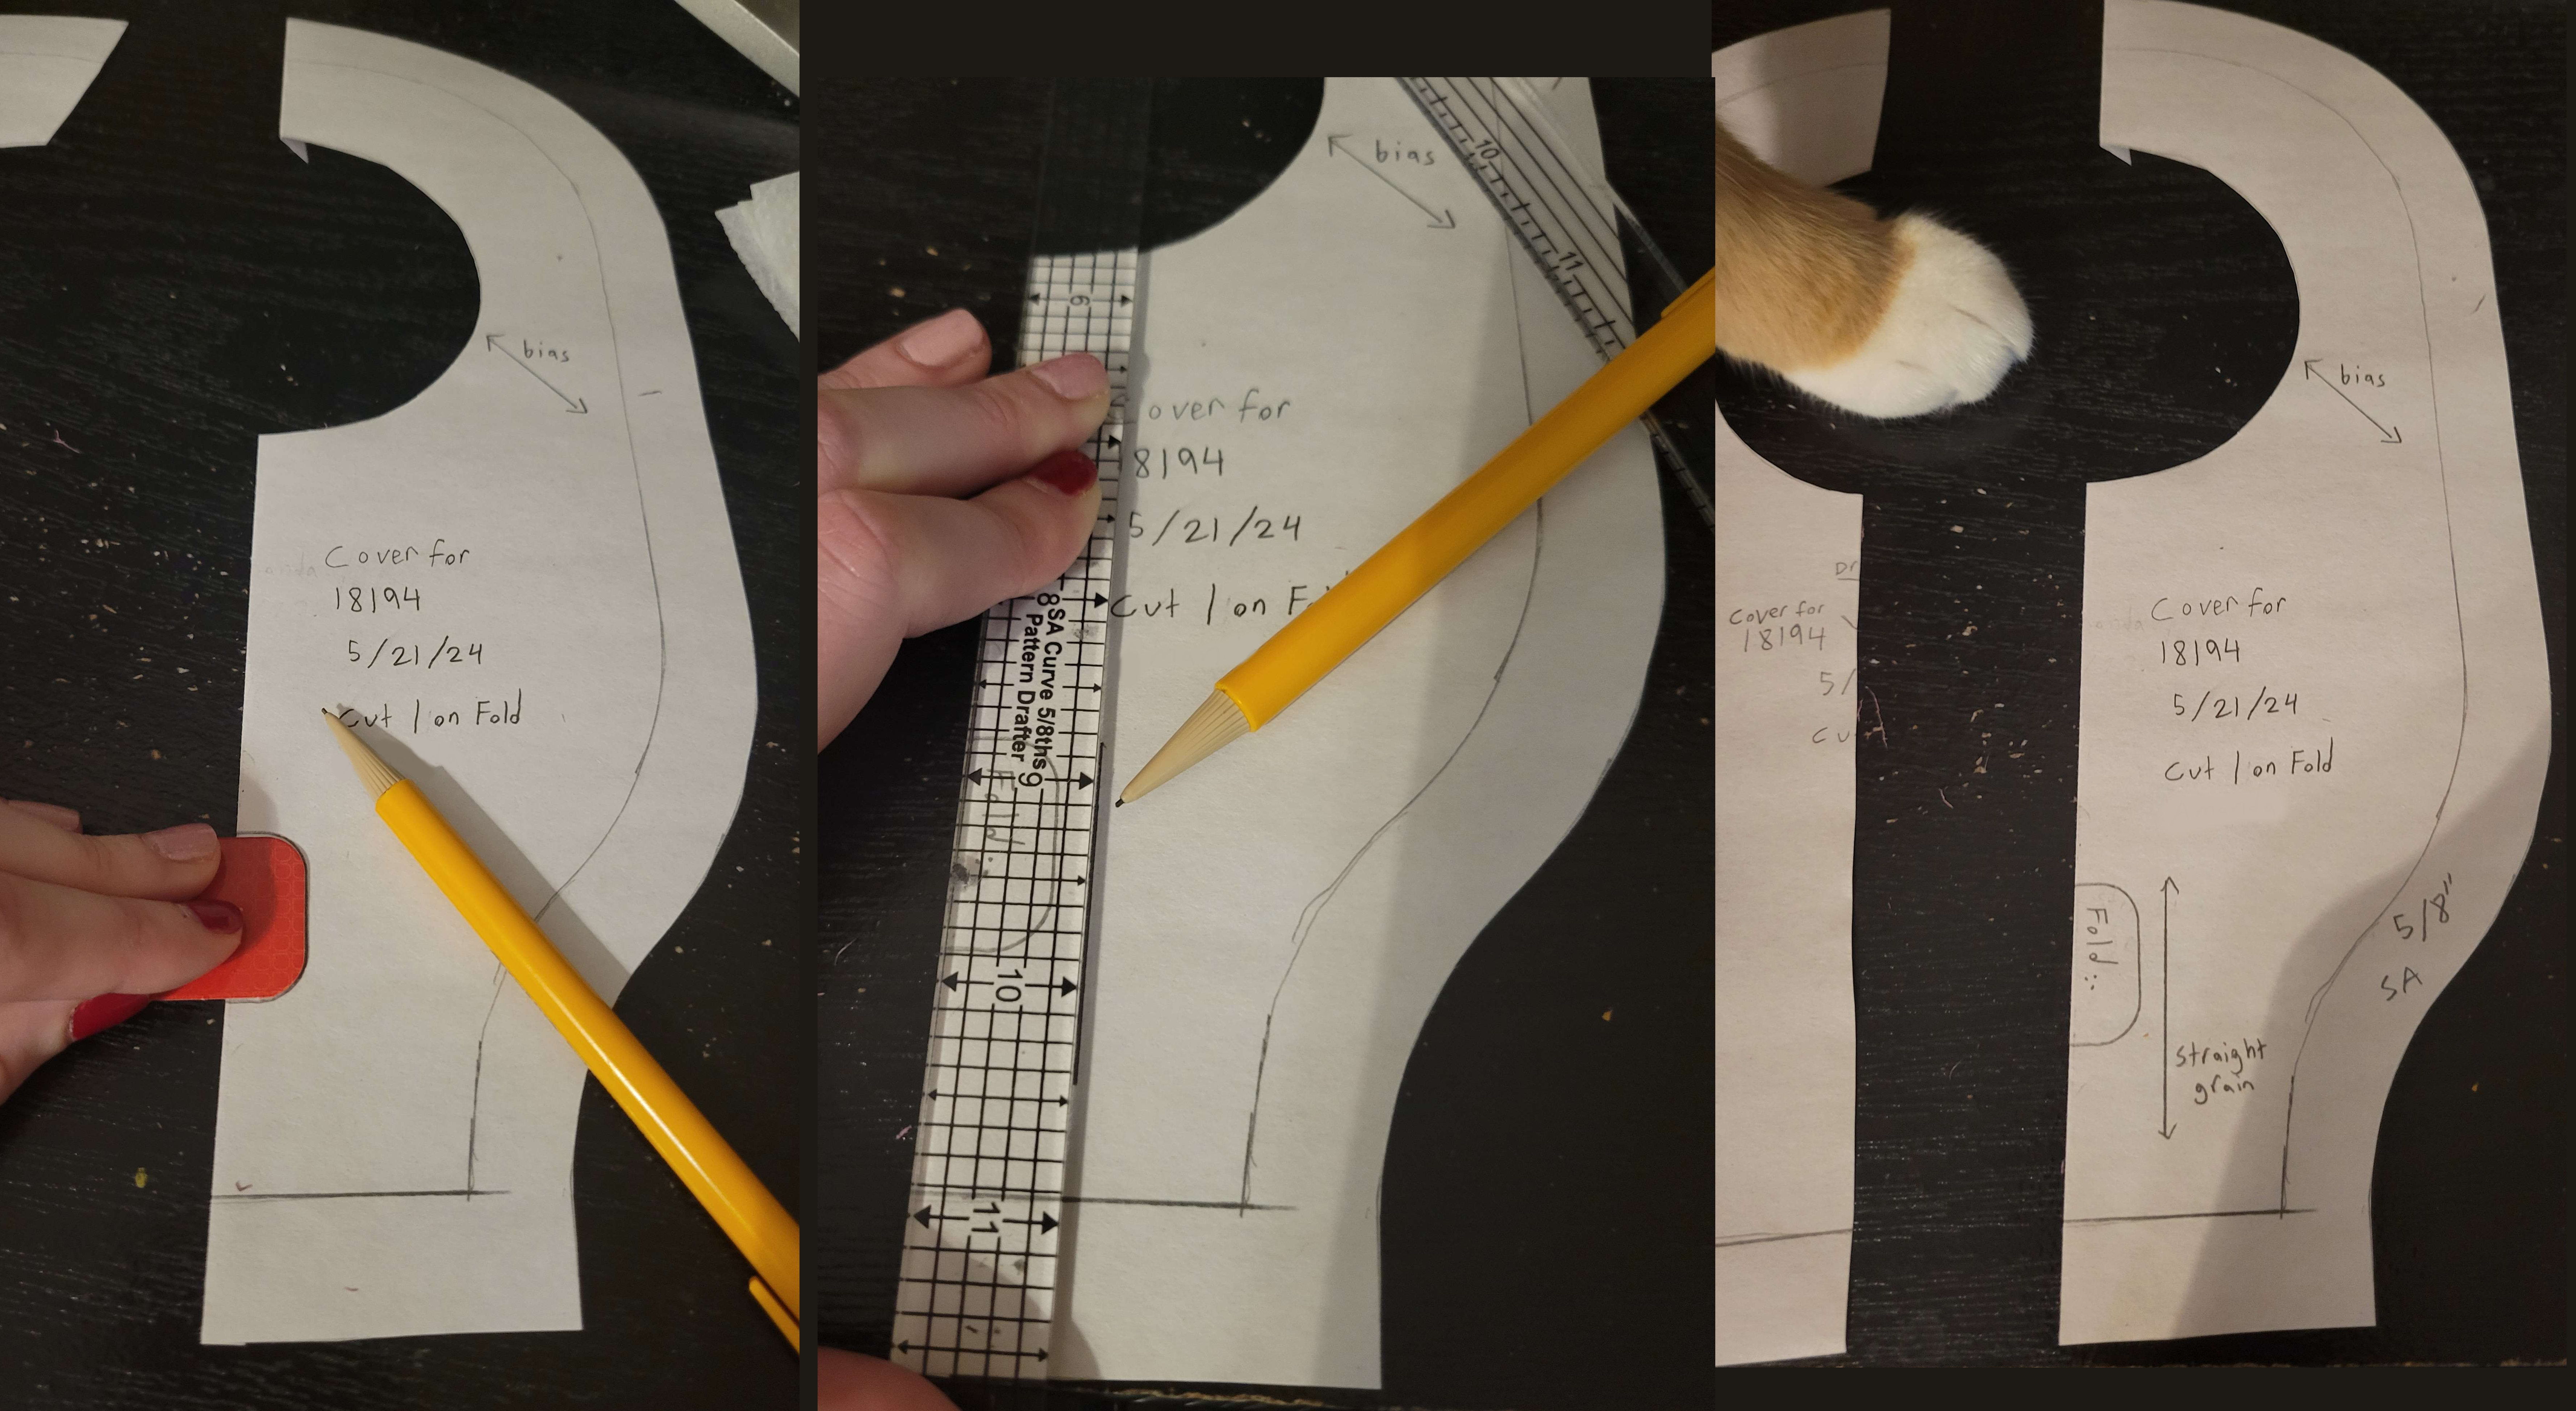
I mark my pieces out of habit, since I like to keep an archive of my pattern-making. Here's some helpful things to mark:
- • The collection and name of the piece. Mine is just a cover for the Hollister 18194, so I didn't get creative with naming.
- • The date
- • Any cutting instructions like "Cut 1 on Fold."
- • The edge that will line up with the fold
- • The seam allowance, usually an extra 5/8" added around a pattern piece when using a home sewing machine. Industrial machines are usually 1/2", I think. It's easier to mark if you have an SA curve, but any see-through ruler will work.
- • The grainline, aligned with the long, strong yarns of a woven cut of fabric. It's usually parallel with the fold-line or the line of symmetry of the pattern piece, so that the finished piece won't stretch out or hang askew.
- • The bias grainline. It's not important unless you are cutting on the bias.
Use your tracing to make real pattern pieces
I made a small mistake during the process, so understand the goal before continuing.
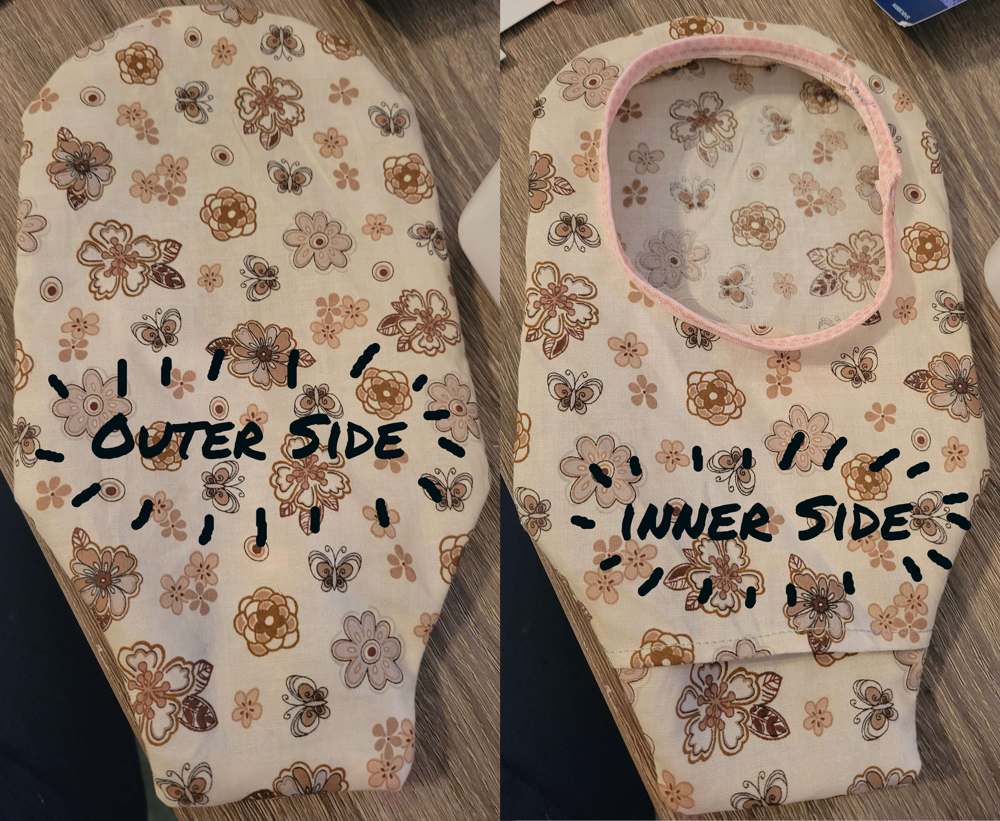
The bag cover needs three pieces: a long outer piece with no circular opening, an upper inner piece with a circular opening, and a lower inner piece. The outer piece covers your bag and can be decorative. The inner pieces will have a 2" overlap, so that the ostomy pouch can be drained without removing the bag cover.
Make the upper inner pattern piece
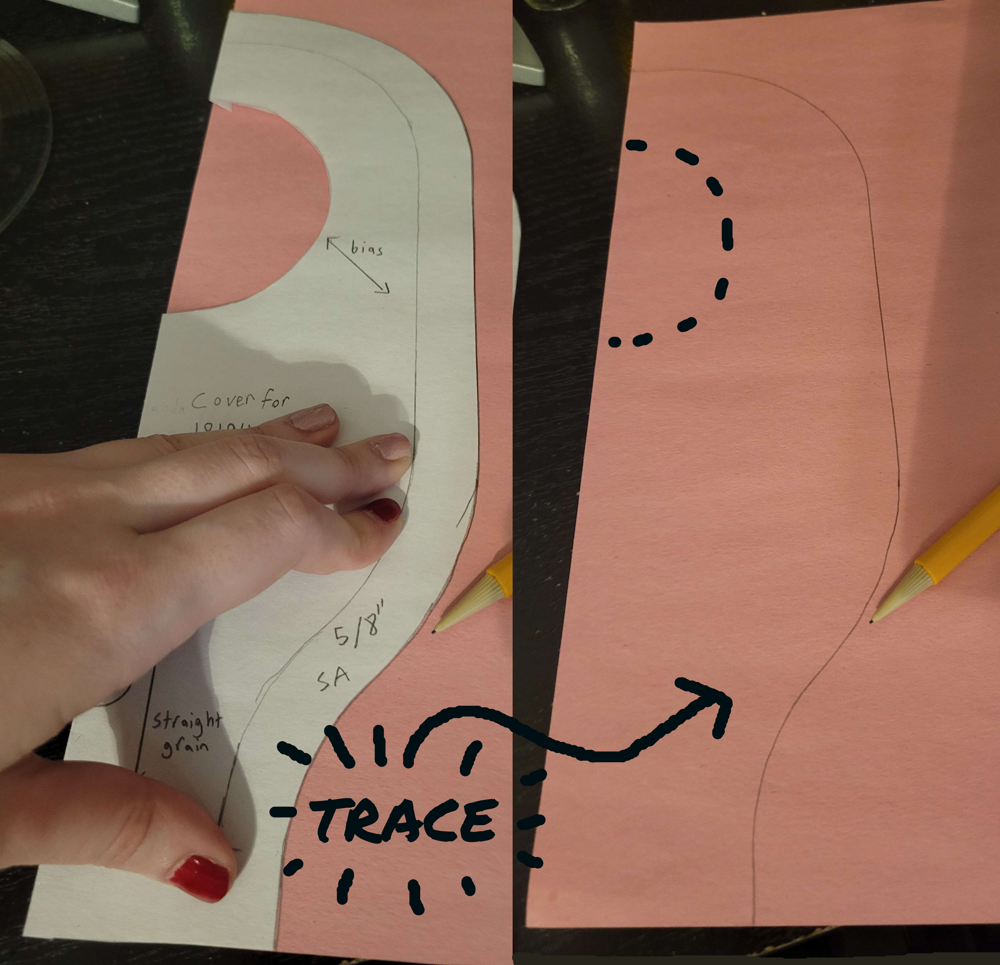
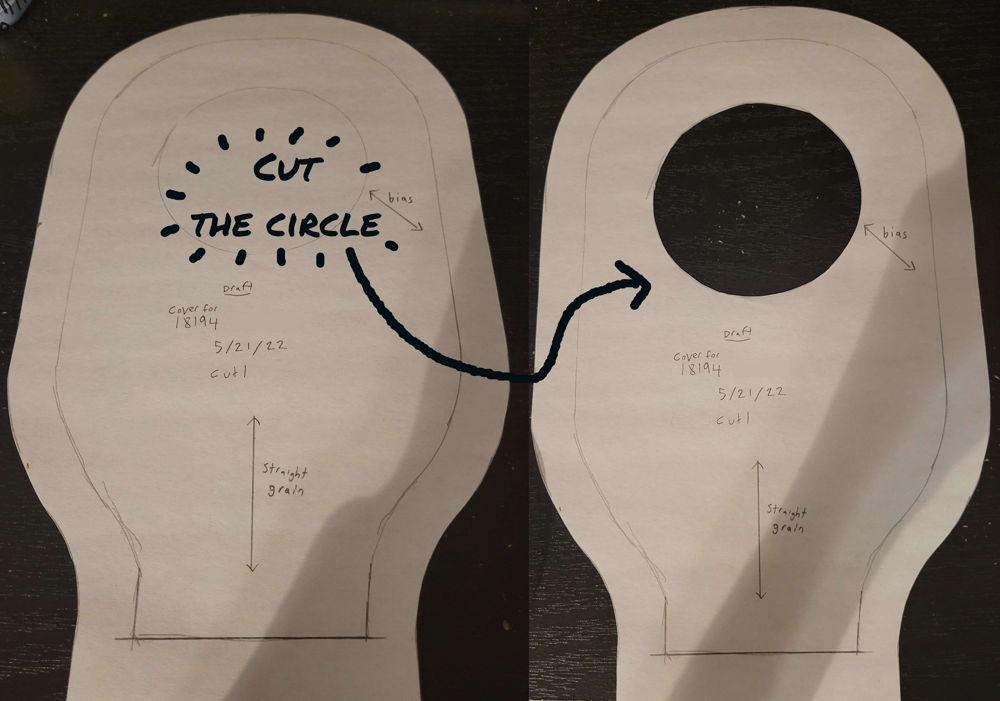
Trace the tracing onto pattern-making paper. I just used pink construction paper. Since this is the start of the two inner pattern pieces, remember to trace the circular opening, too! I didn't...Oops!!
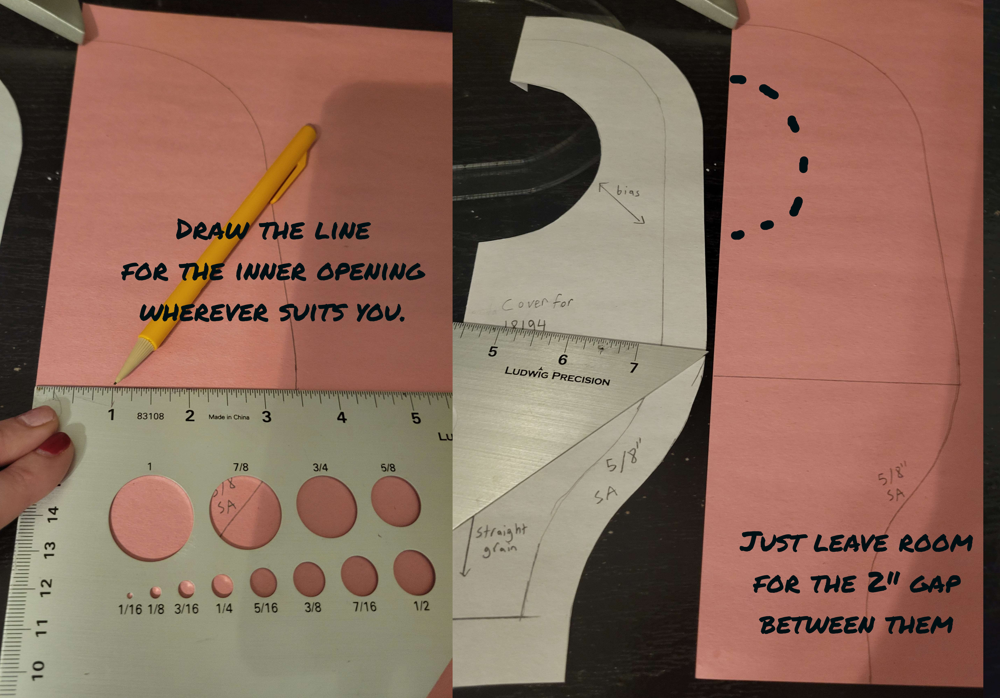
Don't stress while marking, but this placement worked well for me. Mark the 2" overlap that will keep the ostomy pouch secure until it needs to be drained. The upper pattern piece will cover the lower piece.
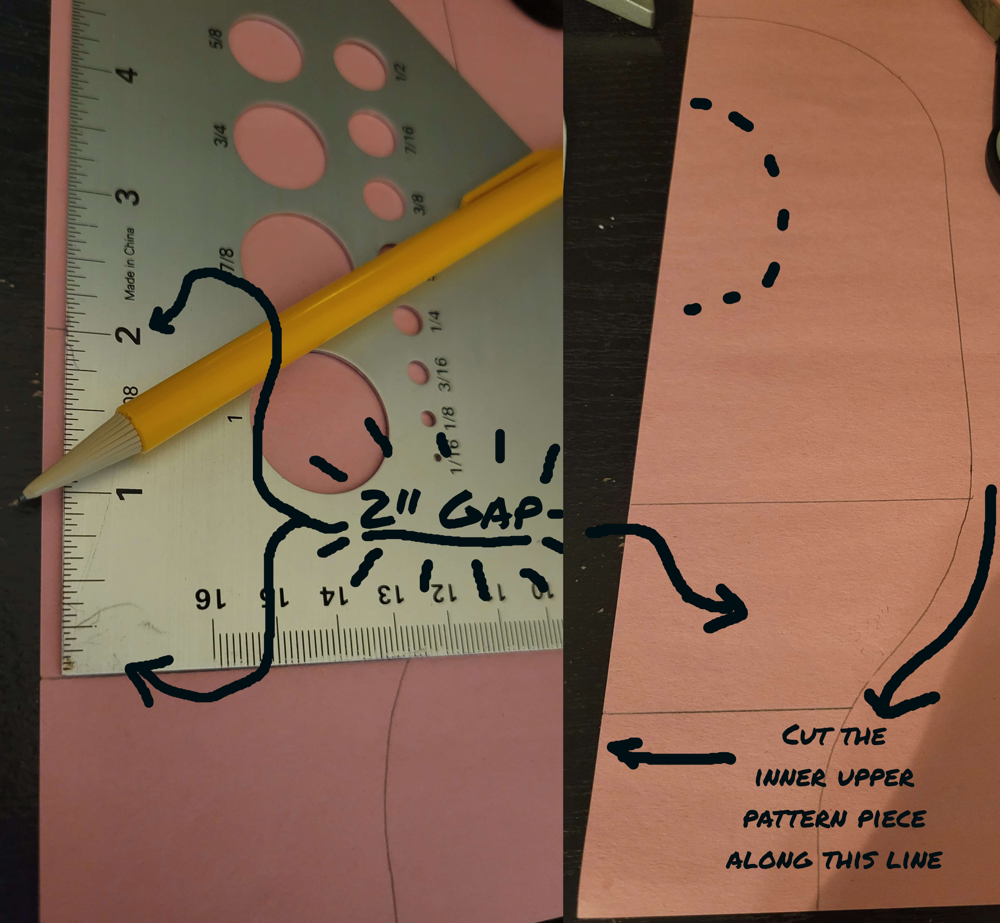
Cut the inner upper pattern piece free. Cut along the entire tracing, including the circular opening and the lowermost line you marked for the overlap. Add any archiving markings you like, and you have made the inner upper pattern piece!
Make the lower inner pattern piece
Use the initial tracing to draft the lower inner pattern piece. Trace around the bottom. Obviously you don't have to trace more than the lower portion.
To mark the top edge of the inner lower pattern piece, line up the inner upper pattern piece with the lower tracing. Use a straight-edge to extend the uppermost line you marked for the overlap beyond the edge of both pieces. Remove the inner upper pattern piece. Then, use a straight-edge with the marking you just made to form the top edge of the inner lower pattern piece.
Overlap the two inner pattern pieces again. Trace the lower edge of the upper piece onto the lower piece. Now the 2" overlap is marked on both inner pieces.
If you remembered to include the circular opening on the upper piece, the inner pieces are complete!
Make the outer pattern piece
The outer pattern piece is easy. It's a repeat of the first pattern piece made, minus the circular opening.
The three pattern pieces have been made
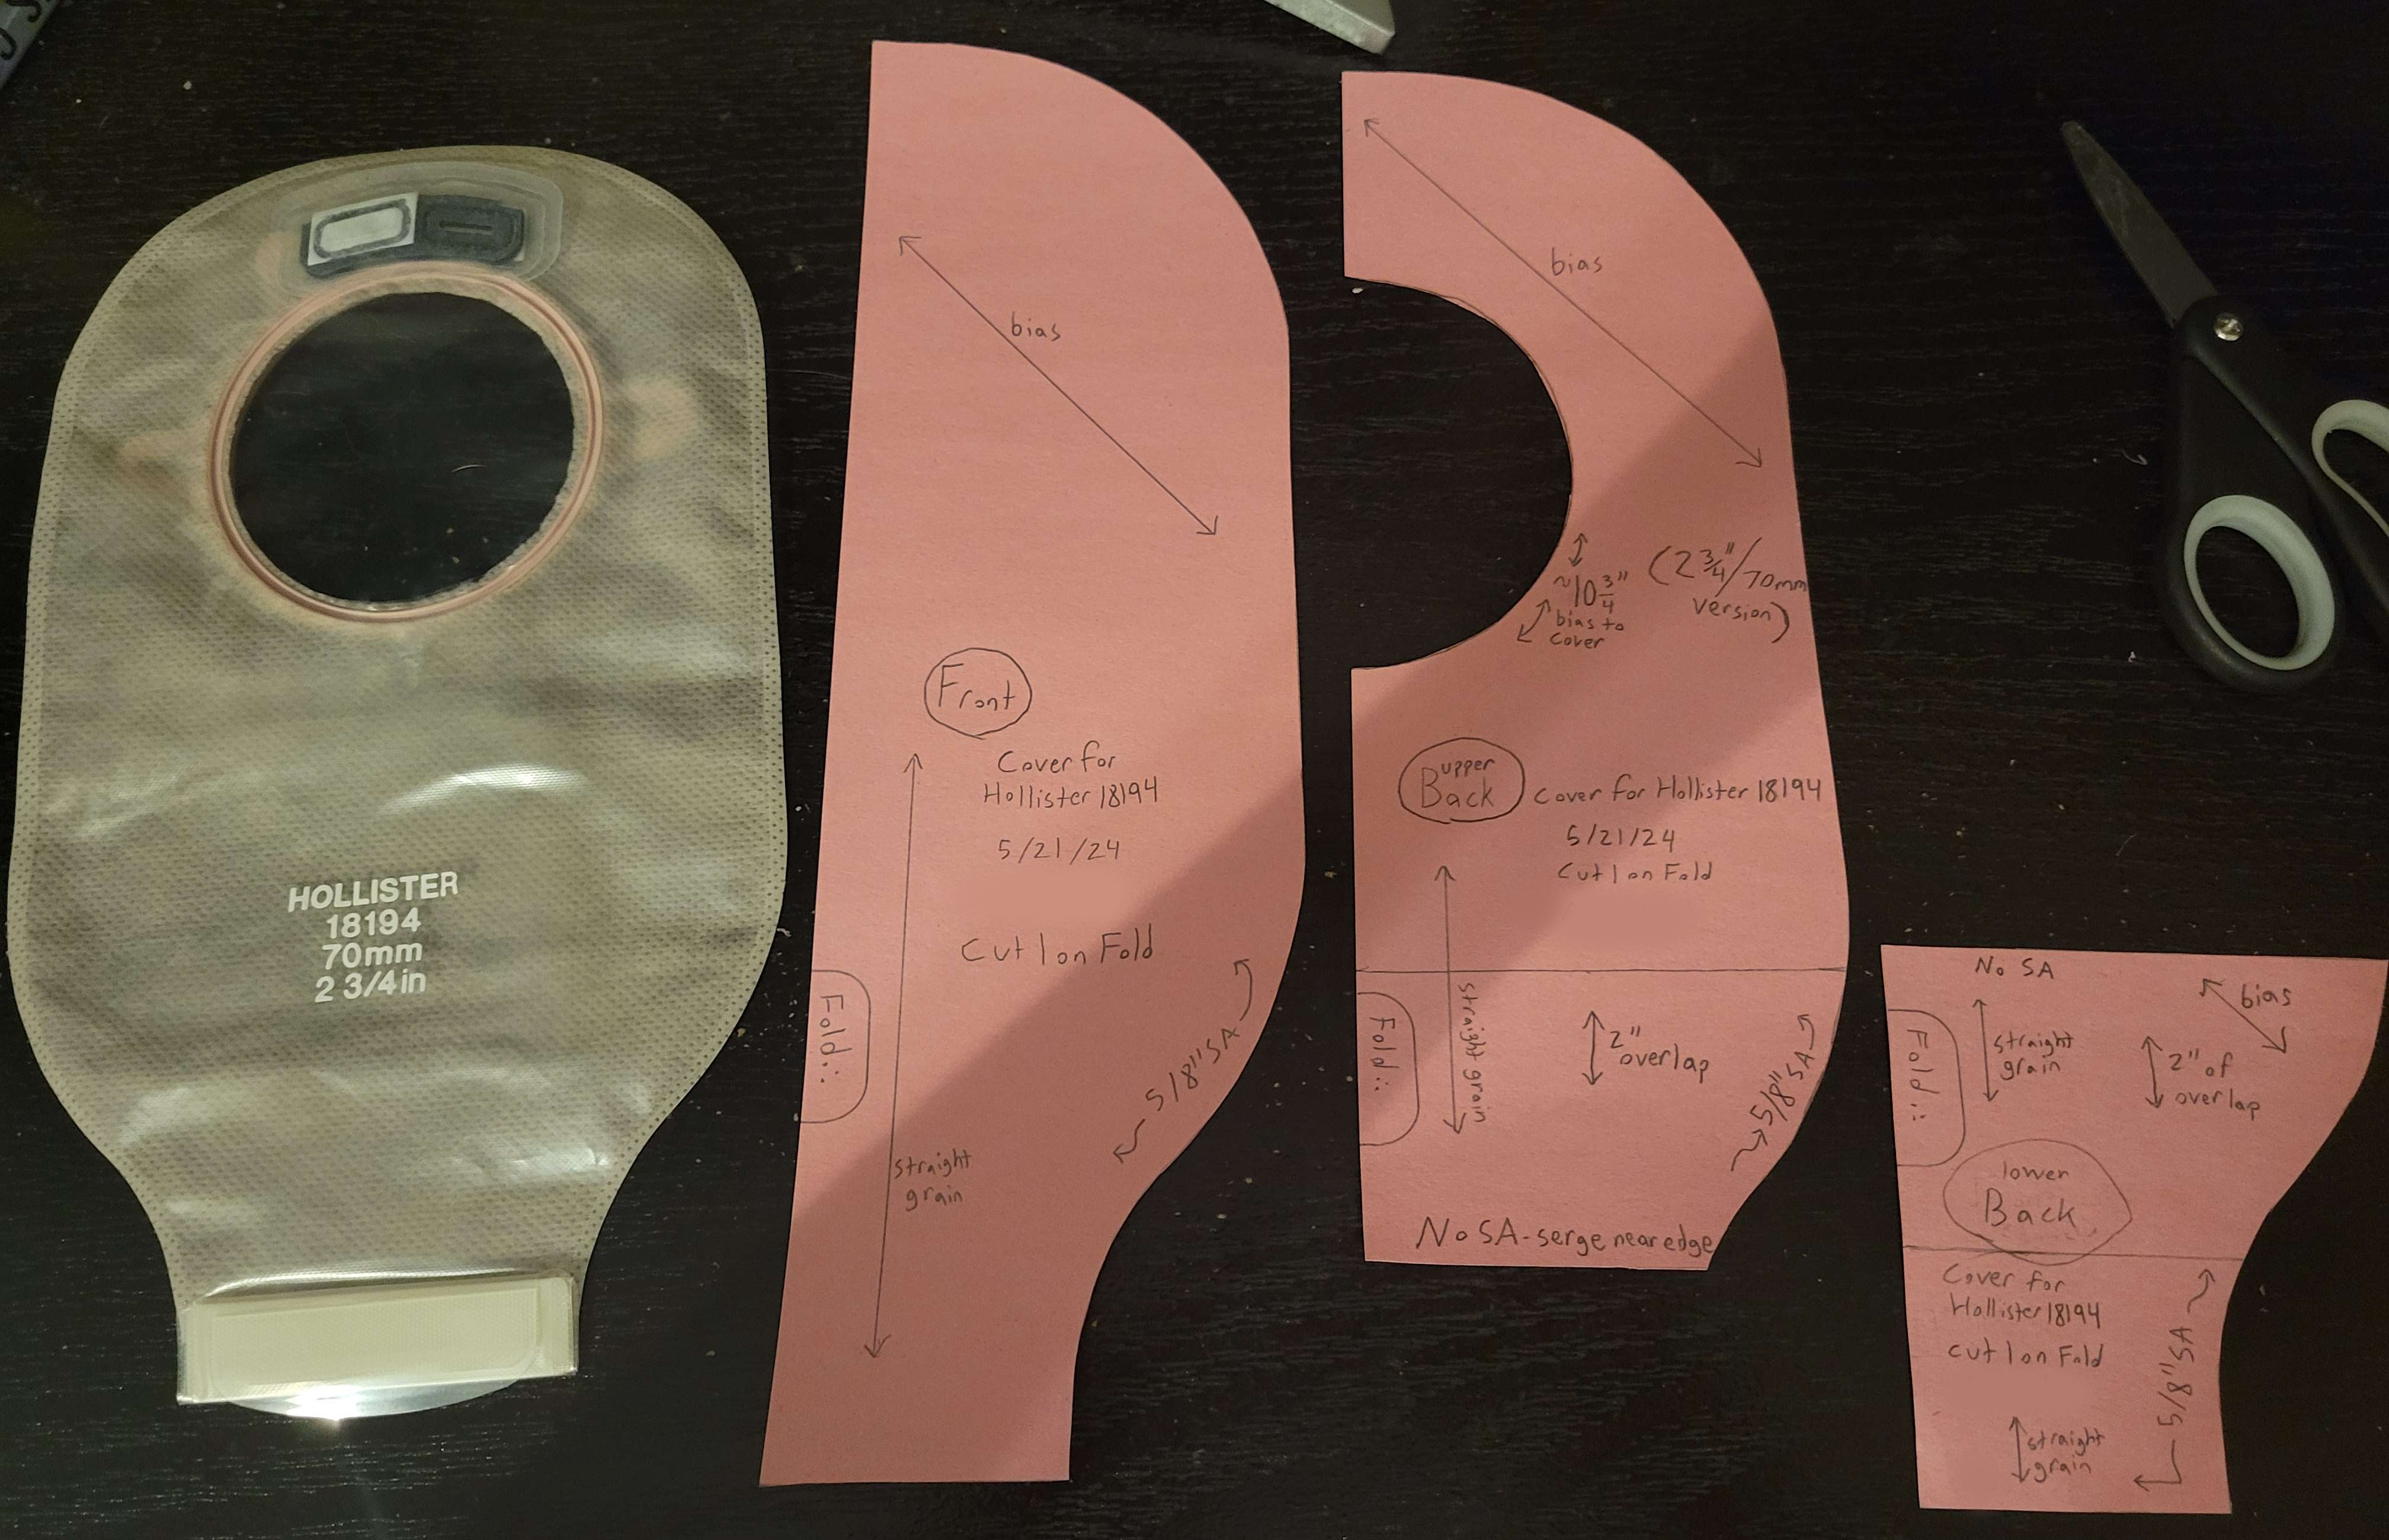
I put the circular opening on the correct piece this time.
Cutting
With the pattern pieces complete, let's sew a prototype!

For the best drape and resilience, take care to fold the fabric along the grainline and align the grain of the pattern pieces. Also, mark on the back of the fabric with an easily removable tailor's chalk to avoid any unsightly markings on the finished piece.
For a prototype of a simple accessory, I took less care, folding quickly and marking on the fashion side of the fabric with a pen.
Cut the pieces out.
Fitting
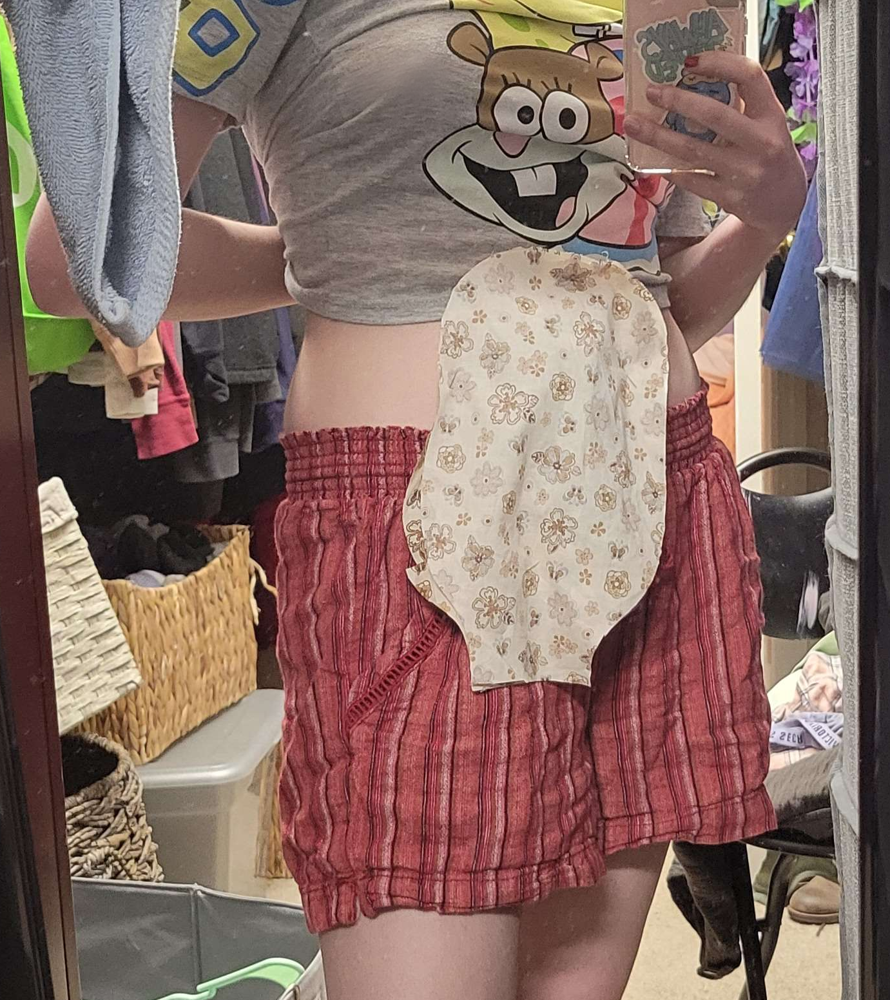
Lightly pinning the pieces together, I tried the bag cover on over my ostomy pouch. If you're scared of pins (reasonable!), you can baste your pieces together, too.
It fits!
If yours has any fit problems, now is the time to adjust your pattern pieces.
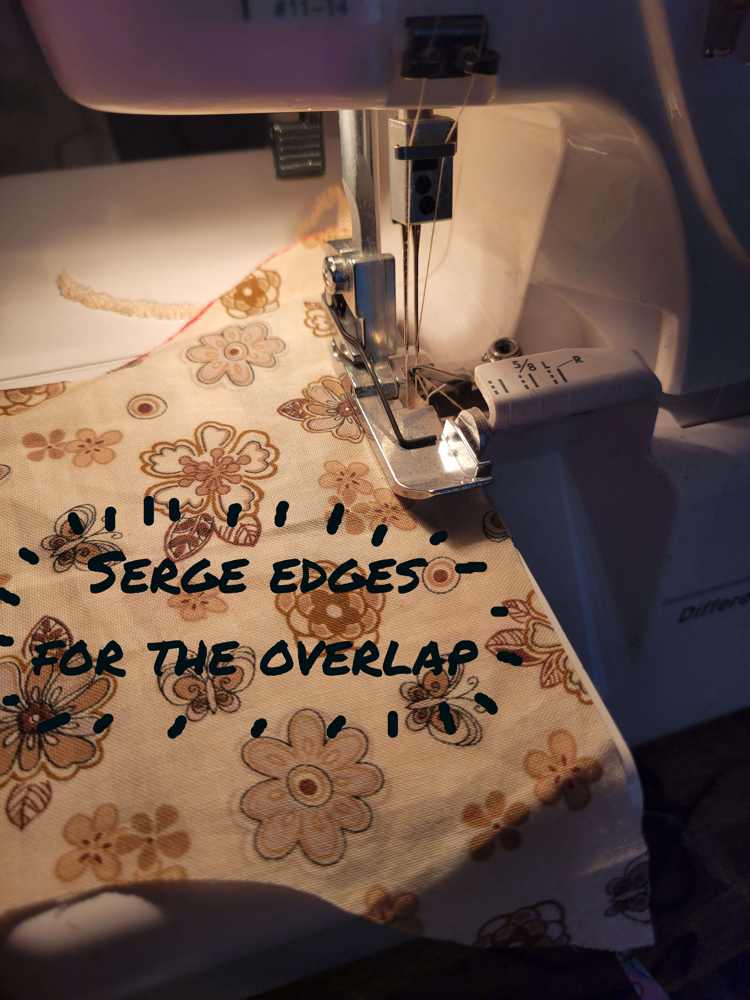
Sewing
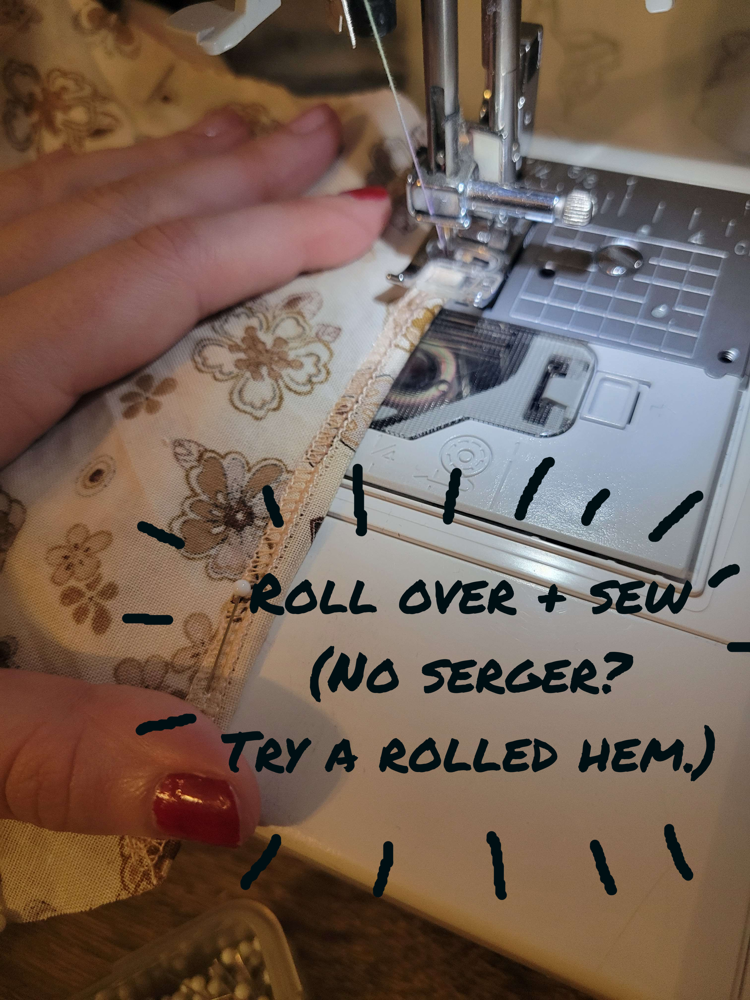
It's time to sew! I have a serger, so I take that extra step to finish the edges of my pieces, but a regular machine stitch will work, too.
Where the overlap will be, serge the edges of the inner upper and lower pieces, then fold them down flat and top-stitch them in place.
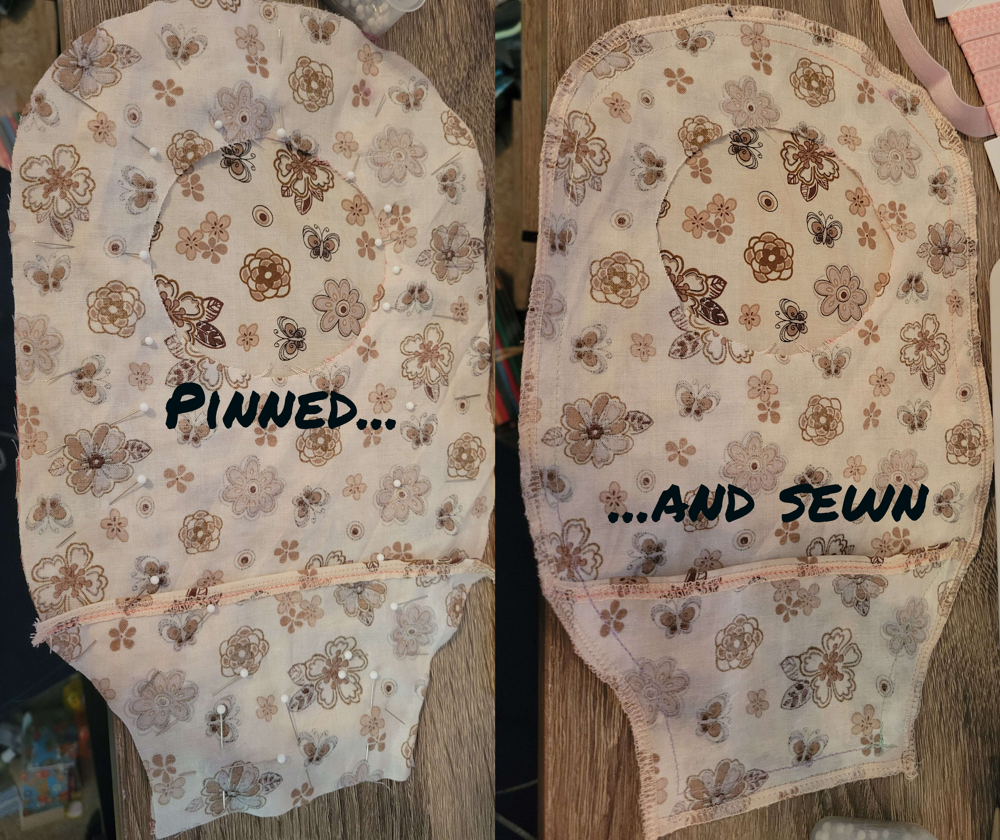
Now pin the three pieces together and sew around the edges. Make sure your overlap is oriented correctly. When turned inside-out like this, the inner lower piece will be on the top, over the inner upper piece.
(It's so nice to pin freely. I have been sewing facemasks lately, and I don't pin those at all to avoid adding holes to the fabric.)
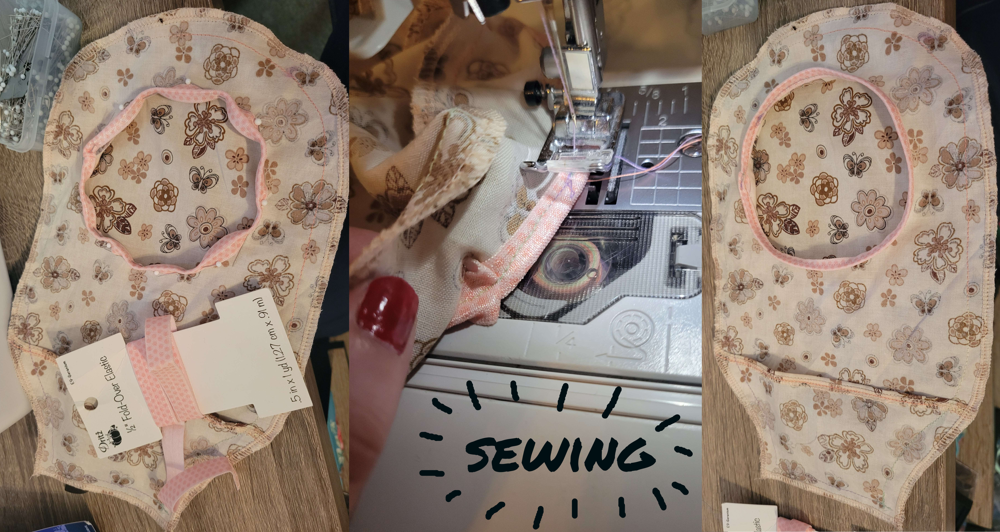
Now for finishing the circular opening.
I used fold-over elastic, but I don't recommend it! It adds too much elasticity and stretches out the opening. Bias tape has enough flexibility to finish the edges without expanding the opening further. I just use the 1/2" double fold from the sewing store.
Sew your bias tape around the opening.
...And we're done.
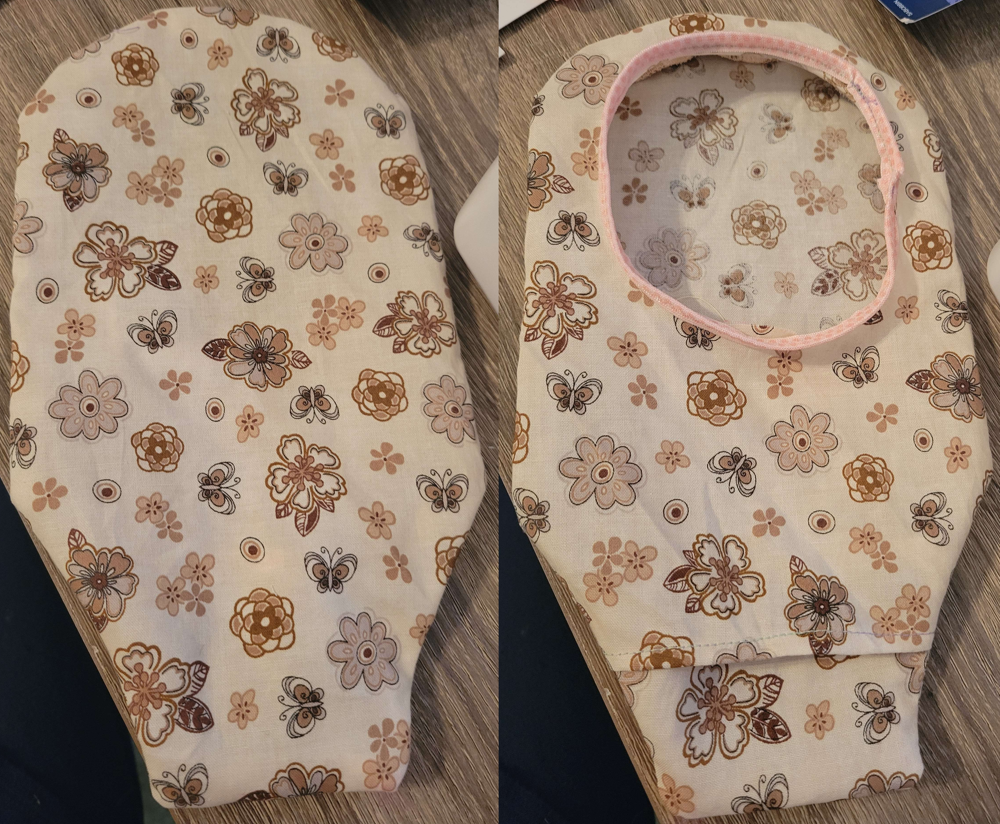
Fitting
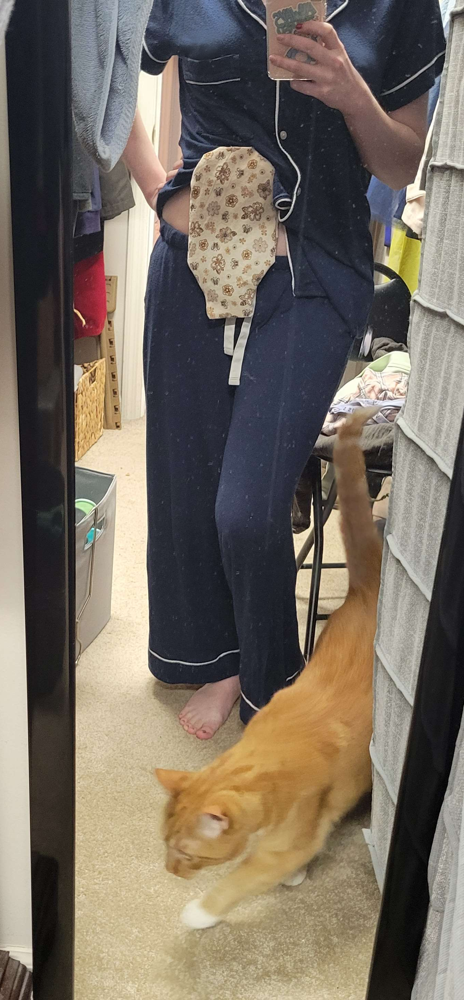
Sooooo much cuter. Now if this shows under my clothes, it just looks like some weird belt or undershirt, as opposed to a medical appliance. The cotton is just enough padding to be comfortable to sleep in, too, without the sharp plastic jabs. Success!
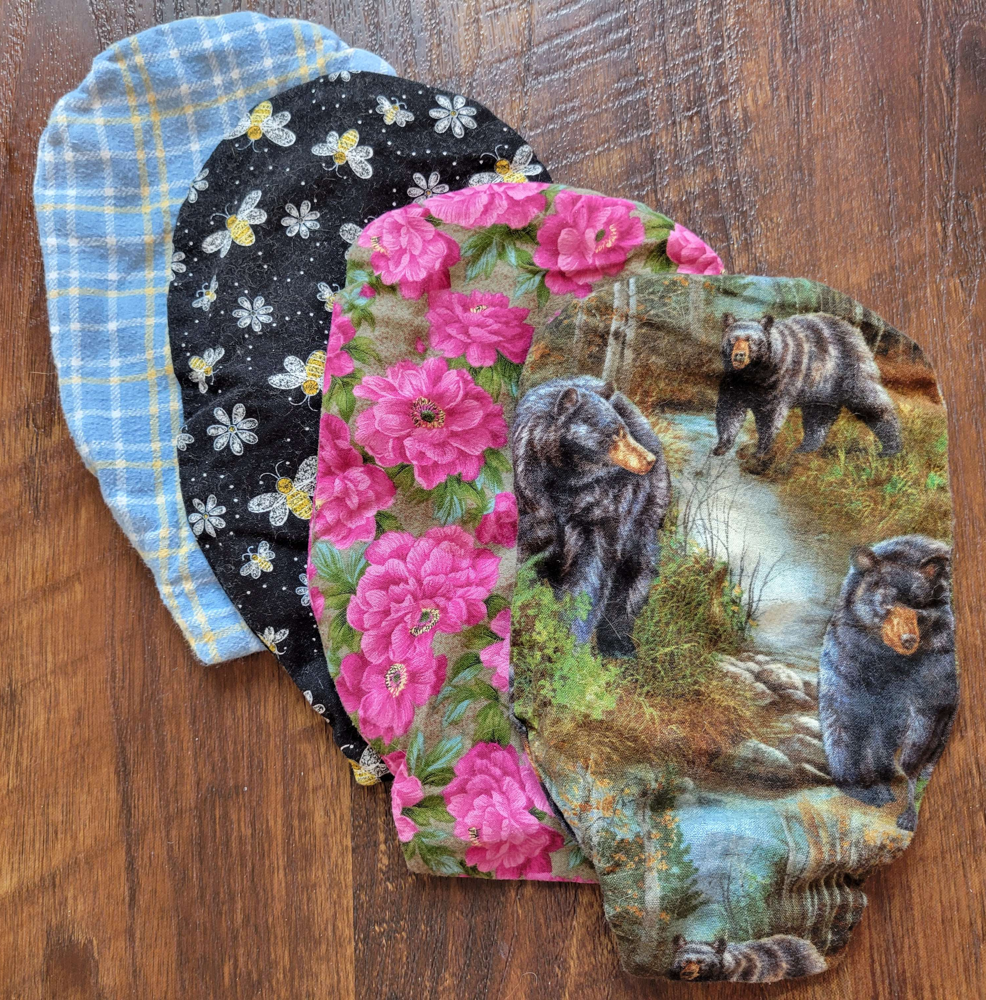
Obviously it can be personalized with seamless nudes or coordinating fabrics and embellishments.
Some people are brave enough to wear their bag cover with a crop top. Imagine reusing the fabric and making matching accessories for it, like a headband or bow. That's what individual beauty is, isn't it? Accentuating what you have that no one else has? I already practice it by sometimes matching my accessories to my chemo pump's luer locks lol. It's not like I can hide my illness, so might as well own it lol.
Have fun, stay positive!